
The Ultimate Photography Backdrop Guide for 2026
Updated on Apr. 14, 2026
The backdrop question haunts every photographer eventually. You're scrolling through a competitor's portfolio, noticing how their portraits have this intentional, editorial quality while yours look like you shot them against whatever wall happened to be nearby. Because you did.
I started Chasing Stone in 2018 after years of that exact frustration. Now, having hand-painted thousands of backdrops and talked with photographers at every level of the industry, I can tell you the knowledge gap isn't about talent. It's about understanding how backdrops actually work and which ones are worth your money.
This is the guide I would have killed for when I was starting out.
Quick Reference: Photography Backdrop Essentials
Here's what you actually need to know before we go any further:
Canvas wins. Hand-painted canvas absorbs light the way skin absorbs light. It creates dimension that vinyl and paper physically cannot replicate. It also doesn't wrinkle into oblivion every time you transport it, which is more than I can say for muslin. A good canvas backdrop lasts 10+ years. I have customers still shooting on backdrops I painted in 2019.
Size matters, but probably not how you think. 5x8 handles headshots and tighter portraits. 8x10 covers full-length individuals and couples with room to breathe. 8x14 is for when you need to fit a bridal party or you're tired of asking brides to bunch up their trains. Most photographers should start with 8x10 and expand from there.
Distance from backdrop: 3-6 feet between your subject and the backdrop. This prevents shadows and gives you separation. Want more blur? Move them further out and shoot wide open.
Your first color should be boring. I mean warm neutral. Taupe. Putty. Something that works with literally every skin tone and wardrobe choice. The exciting colors come later. Your workhorse comes first.
Price reality: You're looking at $497-$1,197 depending on size. Yes, it's more than that Amazon muslin. No, you won't regret it when future brides book you because your portfolio looks like it belongs in a magazine and they want that for themselves.
Now let me explain why all of this is true.
Part 1: Understanding Backdrop Materials
The material you choose affects everything. How light behaves. How colors render. How long your investment lasts. How much time you spend steaming out wrinkles instead of shooting.
Hand-Painted Canvas: The Professional Standard
I'm biased here because I paint these for a living. But the bias comes from experience. After painting over 10,000 backdrops and seeing the results photographers get, I can tell you exactly why canvas dominates professional portrait and wedding photography.
How canvas behaves with light: Canvas has a matte, slightly textured surface that absorbs light rather than reflecting it. When your strobe or window light hits a canvas backdrop, the light scatters softly across the surface. This creates natural dimension. Shadows fall organically across the subtle texture variations. Your subject separates from the background without you needing to add artificial separation in post.
Compare this to vinyl or paper, which reflect light more uniformly. The result is flatter, less dimensional images that require more post-processing to achieve the same depth.
See how the subtle texture variations create natural shadows and dimension? That's what you can't get from vinyl or paper. Canvas absorbs light the way your subjects do, making everything look more intentional.
Durability reality: A quality hand-painted canvas backdrop lasts 10+ years with normal professional use. I have photographers still shooting on backdrops they bought from me in 2019. The paint doesn't crack. The canvas doesn't degrade. They roll tight for transport, set up in minutes, and look the same on wedding day #200 as they did on wedding day #1.
The weight question: Canvas backdrops in the 8x10 size weigh around 20-25 pounds. That's manageable for solo setup. The 8x14 size is heavier (around 30-35 pounds) but still workable with proper stand systems. If you're doing high-volume location work and weight is a primary concern, the 5x8 size keeps things lighter while still covering most portrait scenarios.
Muslin: The Budget Compromise
Muslin was the standard before hand-painted canvas became accessible. It still has a place, but you should understand the trade-offs.
Where muslin falls short: Muslin wrinkles. Constantly. You'll spend 15-20 minutes steaming before every shoot, and even then, wrinkles often show in your images. The fabric also stretches over time, especially at the attachment points. And muslin cannot hold the same depth of painted texture that canvas can. The weave is too loose, so paint sits on top rather than becoming part of the fabric.
When muslin makes sense: If you're just starting out and need something functional while you build your business, muslin works. Just know that you'll likely replace it within 1-2 years as it stretches and degrades, and you'll spend significant time maintaining it.
Vinyl and Paper: Specific Use Cases Only
I'm not going to tell you vinyl and paper are never appropriate. That would be dishonest. But their appropriate uses are narrow.
When vinyl works: High-key product photography where you want a perfectly uniform, reflective white surface. Certain commercial applications where the "fake" look is intentional. Budget photo booths where durability matters more than photographic quality.
When vinyl fails: Portrait photography. Wedding photography. Any scenario where you want natural-looking images with dimension and depth. Vinyl reflects light in a way that screams "this is a backdrop." Discerning clients and editors notice.
Seamless paper: Paper works for high-volume headshot studios cycling through dozens of clients daily. It's disposable by design. You shoot on it, it gets dirty or wrinkled, you roll out fresh paper.
For wedding and portrait photographers who care about the quality of their portfolio, paper creates flat, lifeless backgrounds that will never give you that editorial look you're chasing.
For a detailed breakdown of how canvas, muslin, vinyl, and paper compare across texture, light interaction, durability, portability, and cost, see our full materials comparison guide.
Part 2: Choosing the Right Size
Size selection isn't complicated, but getting it wrong means either buying twice or constantly fighting your frame edges.
5x8 Feet: The Portable Workhorse
Best for:
Headshots and tight portraits (head and shoulders to waist)
Solo portrait sessions where full-length isn't needed
Photographers who prioritize portability above all else
Tight shooting spaces with low ceilings
Limitations:
Full-length shots require careful framing
No room for movement or flowing gowns
Groups are nearly impossible
Transport advantage: A 5x8 canvas rolls to roughly 8 inches in diameter and fits easily in most vehicle trunks. It's the go-to for photographers who fly to destination weddings or work in tight urban spaces.
8x10 Feet: The Versatile Standard
Best for:
Full-length portraits of individuals
Couples portraits with room to breathe
Most wedding day getting-ready and portrait scenarios
Studio photographers who shoot varied sessions
This is the size I recommend most photographers start with. It handles 80% of professional scenarios without being unwieldy. You can shoot headshots, three-quarter length, and full-length all on the same backdrop. Couples fit comfortably. You have room for a flowing veil or train without frantically checking your frame edges.
Weight consideration: An 8x10 canvas weighs roughly 20-25 pounds. That's manageable for one person to set up. If you're concerned about solo setup, practice at home before your first client session. The technique matters more than the weight.
LIMESTONE in 5x8 is the warm neutral workhorse backdrop recommended in our guide and it's our #1 seller for a reason. This portable size handles headshots and tighter portraits perfectly while the warm taupe tone works with every skin tone and wardrobe. Shop at chasingstone.com.
8x14 Feet: The Professional Investment
Best for:
Bridal parties and group shots (4+ people)
Full-length bridal portraits with cathedral trains
Fashion and editorial work with movement
Studio photographers who regularly shoot families and groups
The 8x14 size became our most-requested product because photographers kept asking for more coverage. They were tired of carefully positioning bridesmaids to avoid backdrop edges. Tired of asking brides to hold their trains instead of letting them flow naturally.
The ceiling height factor: An 8x14 backdrop requires ceiling height of at least 10-12 feet for proper hanging. If you're working in standard 8-foot ceiling spaces, you'll need to mount lower and accept that the backdrop won't extend to the floor. Many photographers make this work by shooting waist-up or using furniture to hide the bottom edge.
Size Decision Framework
Ask yourself these questions:
What's the largest group I regularly photograph? If you shoot bridal parties of 6+, you need 8x14. If you primarily shoot individuals and couples, 8x10 handles it.
What's my typical shooting space? Low ceilings and small rooms favor 5x8 or 8x10. High-ceiling studios can accommodate 8x14.
How do I transport my gear? Flying frequently? Consider 5x8 for checked luggage. Driving? Any size works.
What do I want my portfolio to look like? If you're trying to attract higher-end clients with editorial-quality work, invest in the size that gives you creative freedom rather than the size that barely gets the job done.
Part 3: Color Strategy That Actually Works
Color selection paralyzes photographers. I get it. You're making a real investment, and you want it to work for everything.
Here's the framework I recommend after seeing what actually gets used by thousands of photographers:
Your First Backdrop: The Warm Neutral
Your first backdrop should be a workhorse. Something that works with any wardrobe, any skin tone, any wedding color palette. Something you grab without thinking because you know it won't fail you.
That's a warm neutral.
Colors like taupe, putty, warm grey, or light tan accomplish this. They're not boring. They're reliable. The warm undertone flatters skin. The neutral base doesn't compete with colorful styling elements. The subtle texture adds interest without dominating.
I'd estimate 70% of the backdrops I ship are in this warm neutral range. Not because photographers lack creativity, but because these colors actually get used on 80% of shoots.
Specific recommendations from our collection:
LIMESTONE: Light tan, universally flattering
BENTONITE: Mid-taupe with warm grey undertones
SANDSTONE: Peachy-brown earth tones
Your Second Backdrop: Adding Depth
After you've shot 10-20 sessions on your neutral and understand how you actually use it, add a second color that expands your range.
Two directions work well:
Go darker for mood: A deep brown, rich terracotta, or moody green creates dramatic editorial options. These backdrops photograph beautifully for intimate boudoir work, moody bridal portraits, and anything where you want visual weight behind your subject.
Go lighter for fresh aesthetics: A soft blush, pale blue, or creamy white opens up light-and-airy possibilities. These work beautifully for newborn sessions, spring weddings, and brands with feminine aesthetics.
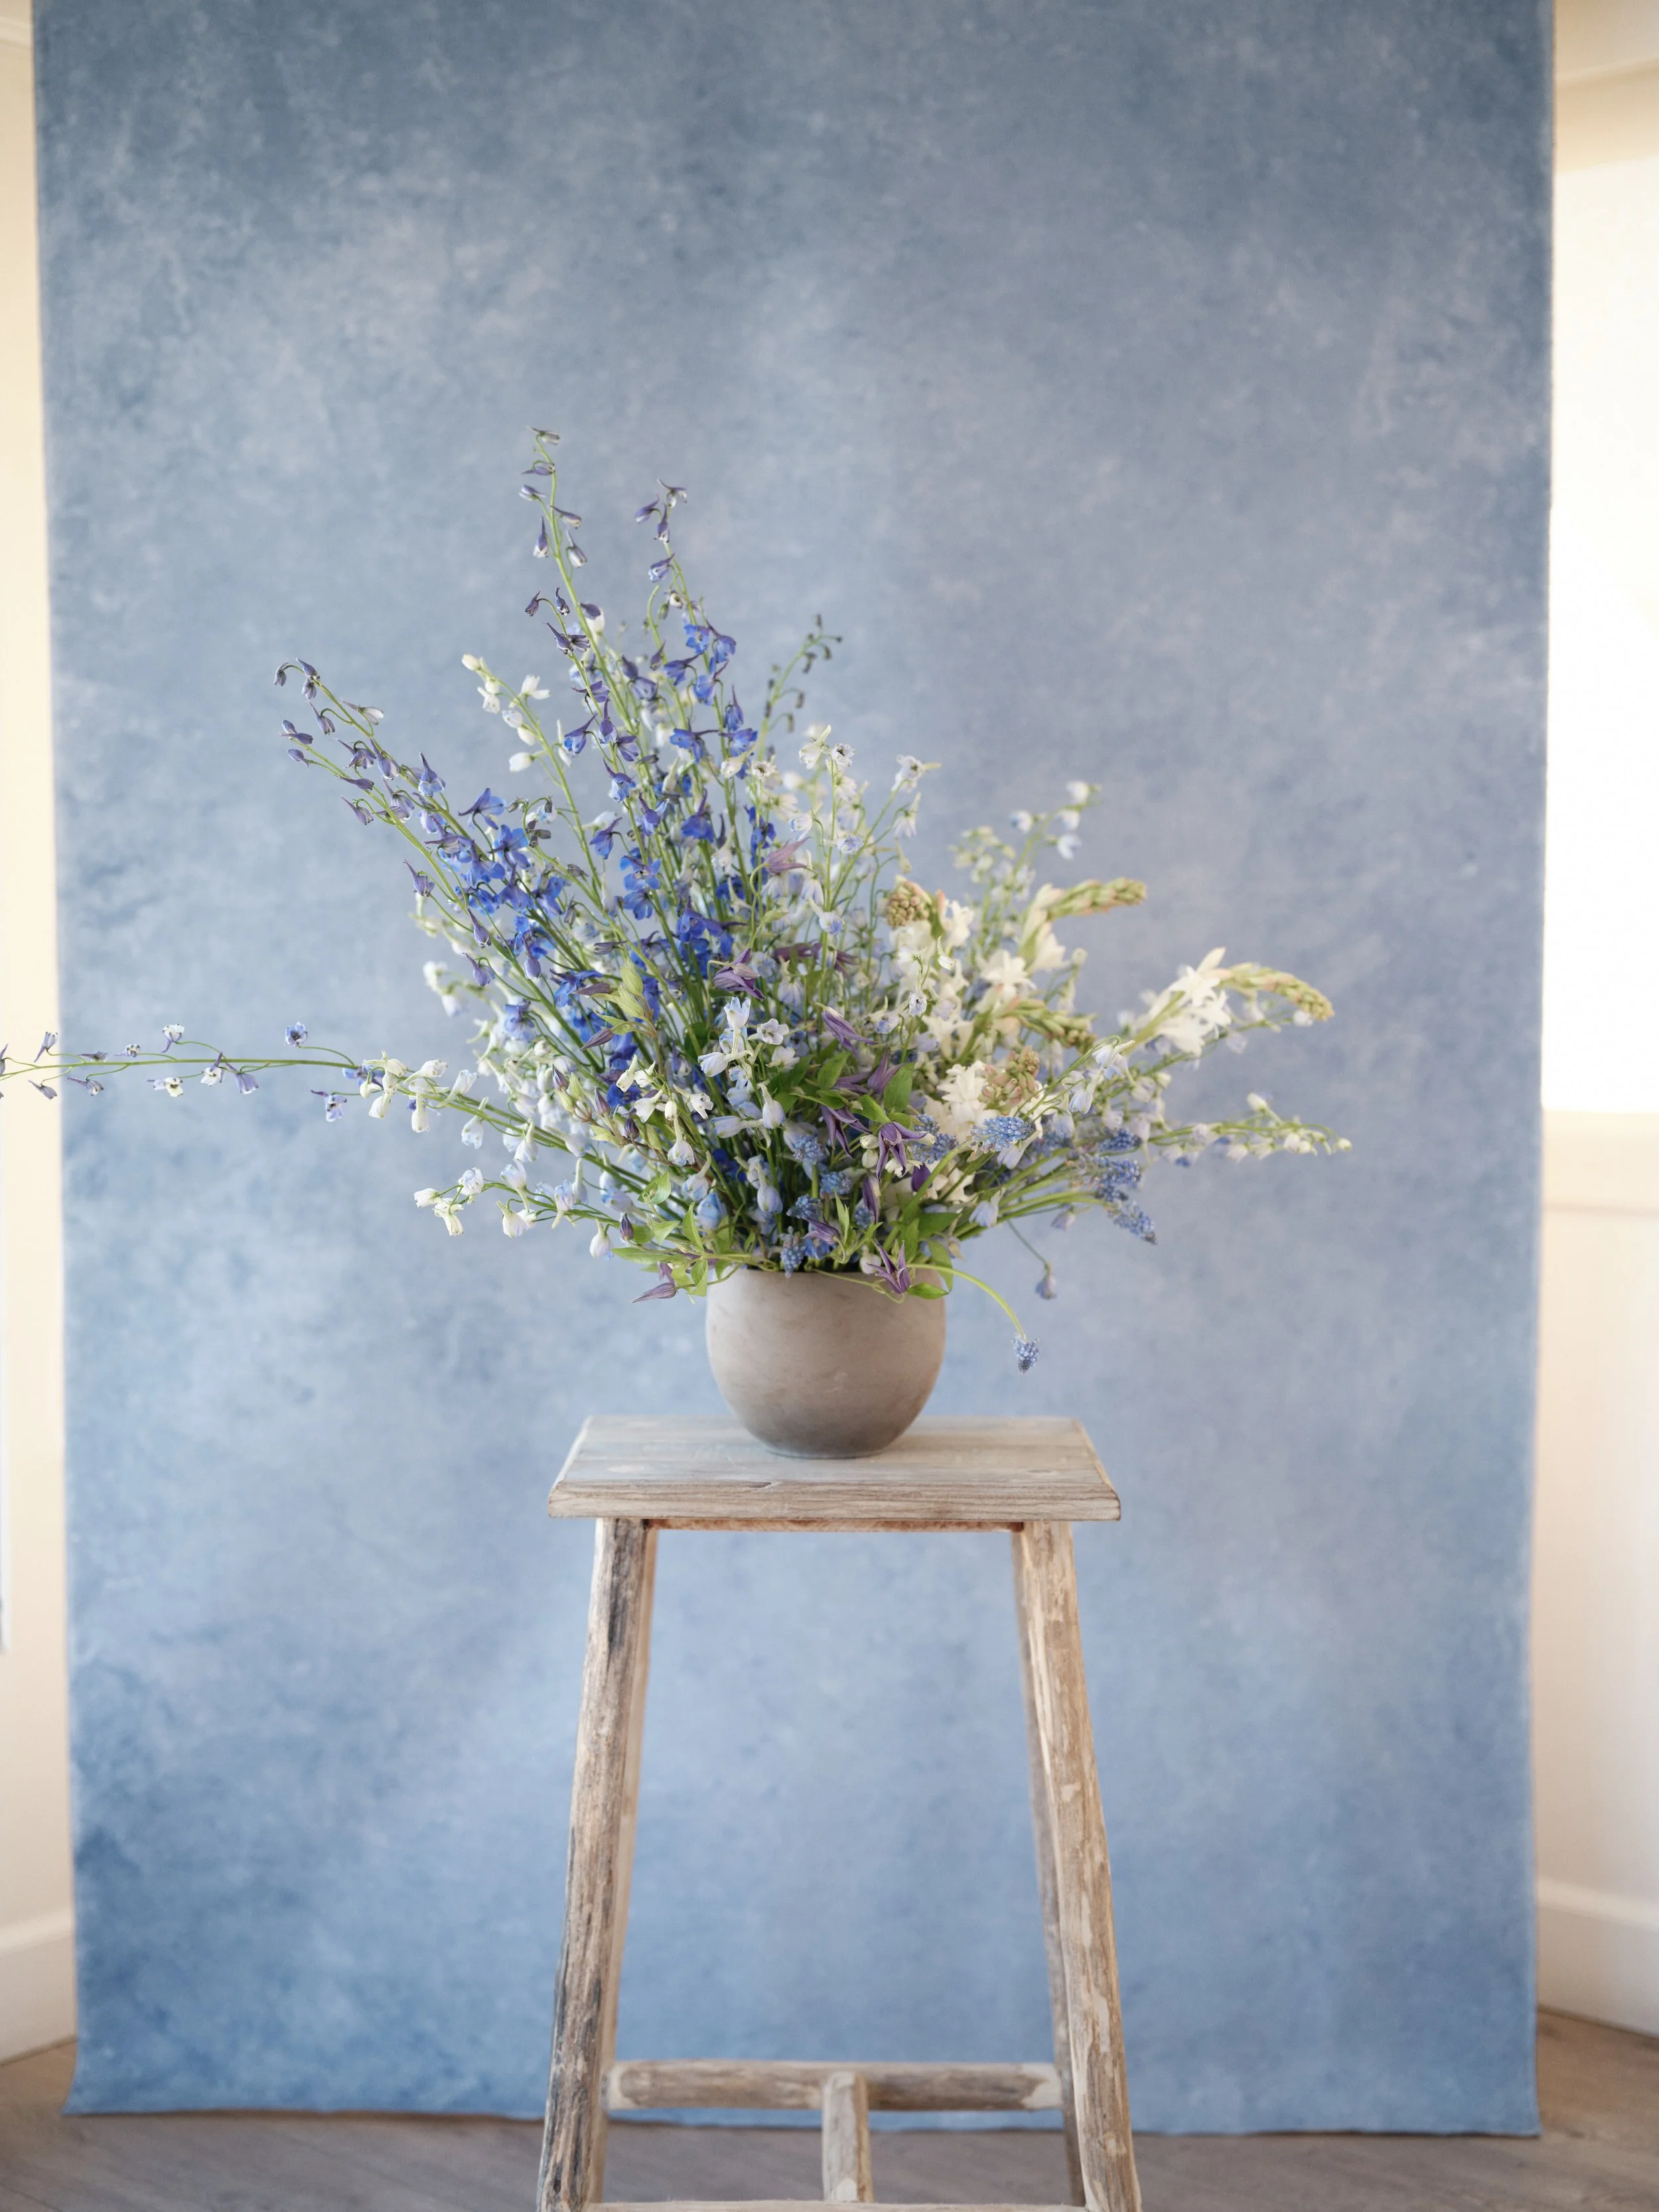
This is LAPIS, the soft blue that photographers add when they're ready to expand beyond neutrals. Cool enough to create that fresh spring aesthetic, subtle enough to let your florals and subjects shine. Hand-painted texture that works beautifully with cool skin tones without clashing.
Color and Skin Tone Compatibility
This matters, and too many guides gloss over it.
Warm skin tones (yellow, olive, golden undertones): Earthy colors complement beautifully. Terracotta, sage, warm browns, and golden tans enhance the natural warmth. Avoid cool blues and greys that can make warm skin look sallow.
Cool skin tones (pink, red, blue undertones): Dusty blues, soft greys, and cool-toned neutrals create flattering contrast. Cool skin also handles jewel tones well. Be careful with orange-heavy terracottas that can clash.
Universal options: Warm neutrals in the taupe/putty range work across all skin tones. This is why they're the default first-backdrop recommendation.
Colors to Avoid (Or Use Carefully)
Pure white: White backdrops bounce light onto your subject, which can create unflattering color casts and reduce contrast. White also shows every scuff, every footprint, every imperfection. If you need white backgrounds, consider shooting on light grey and adjusting in post.
Saturated primary colors: Bright red, royal blue, and kelly green are difficult to work with. They reflect strongly onto skin and clothing, creating color casts that are hard to correct. They also limit your wardrobe options dramatically.
Trendy colors without lasting power: That neon coral might be trending on Instagram this month, but will it photograph well in 2028? Will your clients' wedding albums look dated? Stick to timeless options for your core collection. Save trendy colors for rental or budget additions.
Part 4: Setup and Positioning
You can have the perfect backdrop and still get mediocre results if your setup is wrong. Here's how to position everything for professional results.
Subject-to-Backdrop Distance
Minimum distance: 3 feet This is the absolute minimum to prevent your subject from casting shadows onto the backdrop. At 3 feet, you'll still see some shadow detail in certain lighting conditions, but it's workable.
Optimal distance: 4-6 feet This range gives you clean separation with no shadow interference. Your backdrop texture renders beautifully without competing with your subject. Most of my product photos are shot in this range.
Maximum blur distance: 6-8+ feet Want your backdrop to blur into a creamy, undefined wash of color? Increase the distance. Combined with a wide aperture (f/2.8 or wider) and a longer focal length (85mm+), you can make your backdrop essentially disappear into soft texture and tone.
Backdrop Positioning Relative to Light
Natural light (window): Position your backdrop perpendicular to the window, not facing it. If your window is on the left, your backdrop goes on the right side of the room (or vice versa). This prevents the backdrop from competing with your main light source and creates natural falloff.
Studio strobes: Your key light should hit the backdrop at an angle, not straight-on. A 45-degree angle creates dimension and emphasizes texture. Straight-on lighting flattens everything and wastes the dimensional quality you paid for.
Avoiding hot spots: If you're seeing bright spots on your backdrop while the edges fall to shadow, your light is too close or too narrow. Move the light back. Use a larger modifier. Or add a second light specifically for backdrop illumination (set 1-2 stops below your key light).
Stand Systems That Actually Work
Traditional backdrop stands: The classic crossbar-and-tripod system works fine for studio use. Look for stands rated for at least 15 pounds of capacity. Cheap stands flex and sway, which causes your backdrop to move during shoots.
C-stands with adapter mounts: This is how I shoot and what I recommend for location work. C-stands are heavy and stable. With adapter mounts (like our Floating Backdrop Adapter Mount), you can suspend the backdrop without a crossbar, creating a cleaner look and easier positioning.
Wall-mounted systems: For permanent studio installations, wall-mounted roller systems let you have multiple backdrops ready to pull down. These require ceiling height and wall space, but they're the fastest setup option for high-volume studios.
The 2-Minute Setup Method
This is the system I use in my studio every day, and it works for any size backdrop:
Roll out your backdrop and identify the top edge (usually has a hem or hanging loops)
Attach your clamps or adapter mounts to the top edge, spacing them evenly
Raise your stands to height, securing the backdrop at the top
Let gravity do the work. The weight of the canvas naturally pulls out minor wrinkles
Adjust positioning so the backdrop is perpendicular to your shooting angle
Total time: Under 2 minutes once you've practiced. I've watched photographers spend 15-20 minutes fighting with backdrops because they never learned an efficient system. That's 15-20 minutes of wedding day time you're wasting.
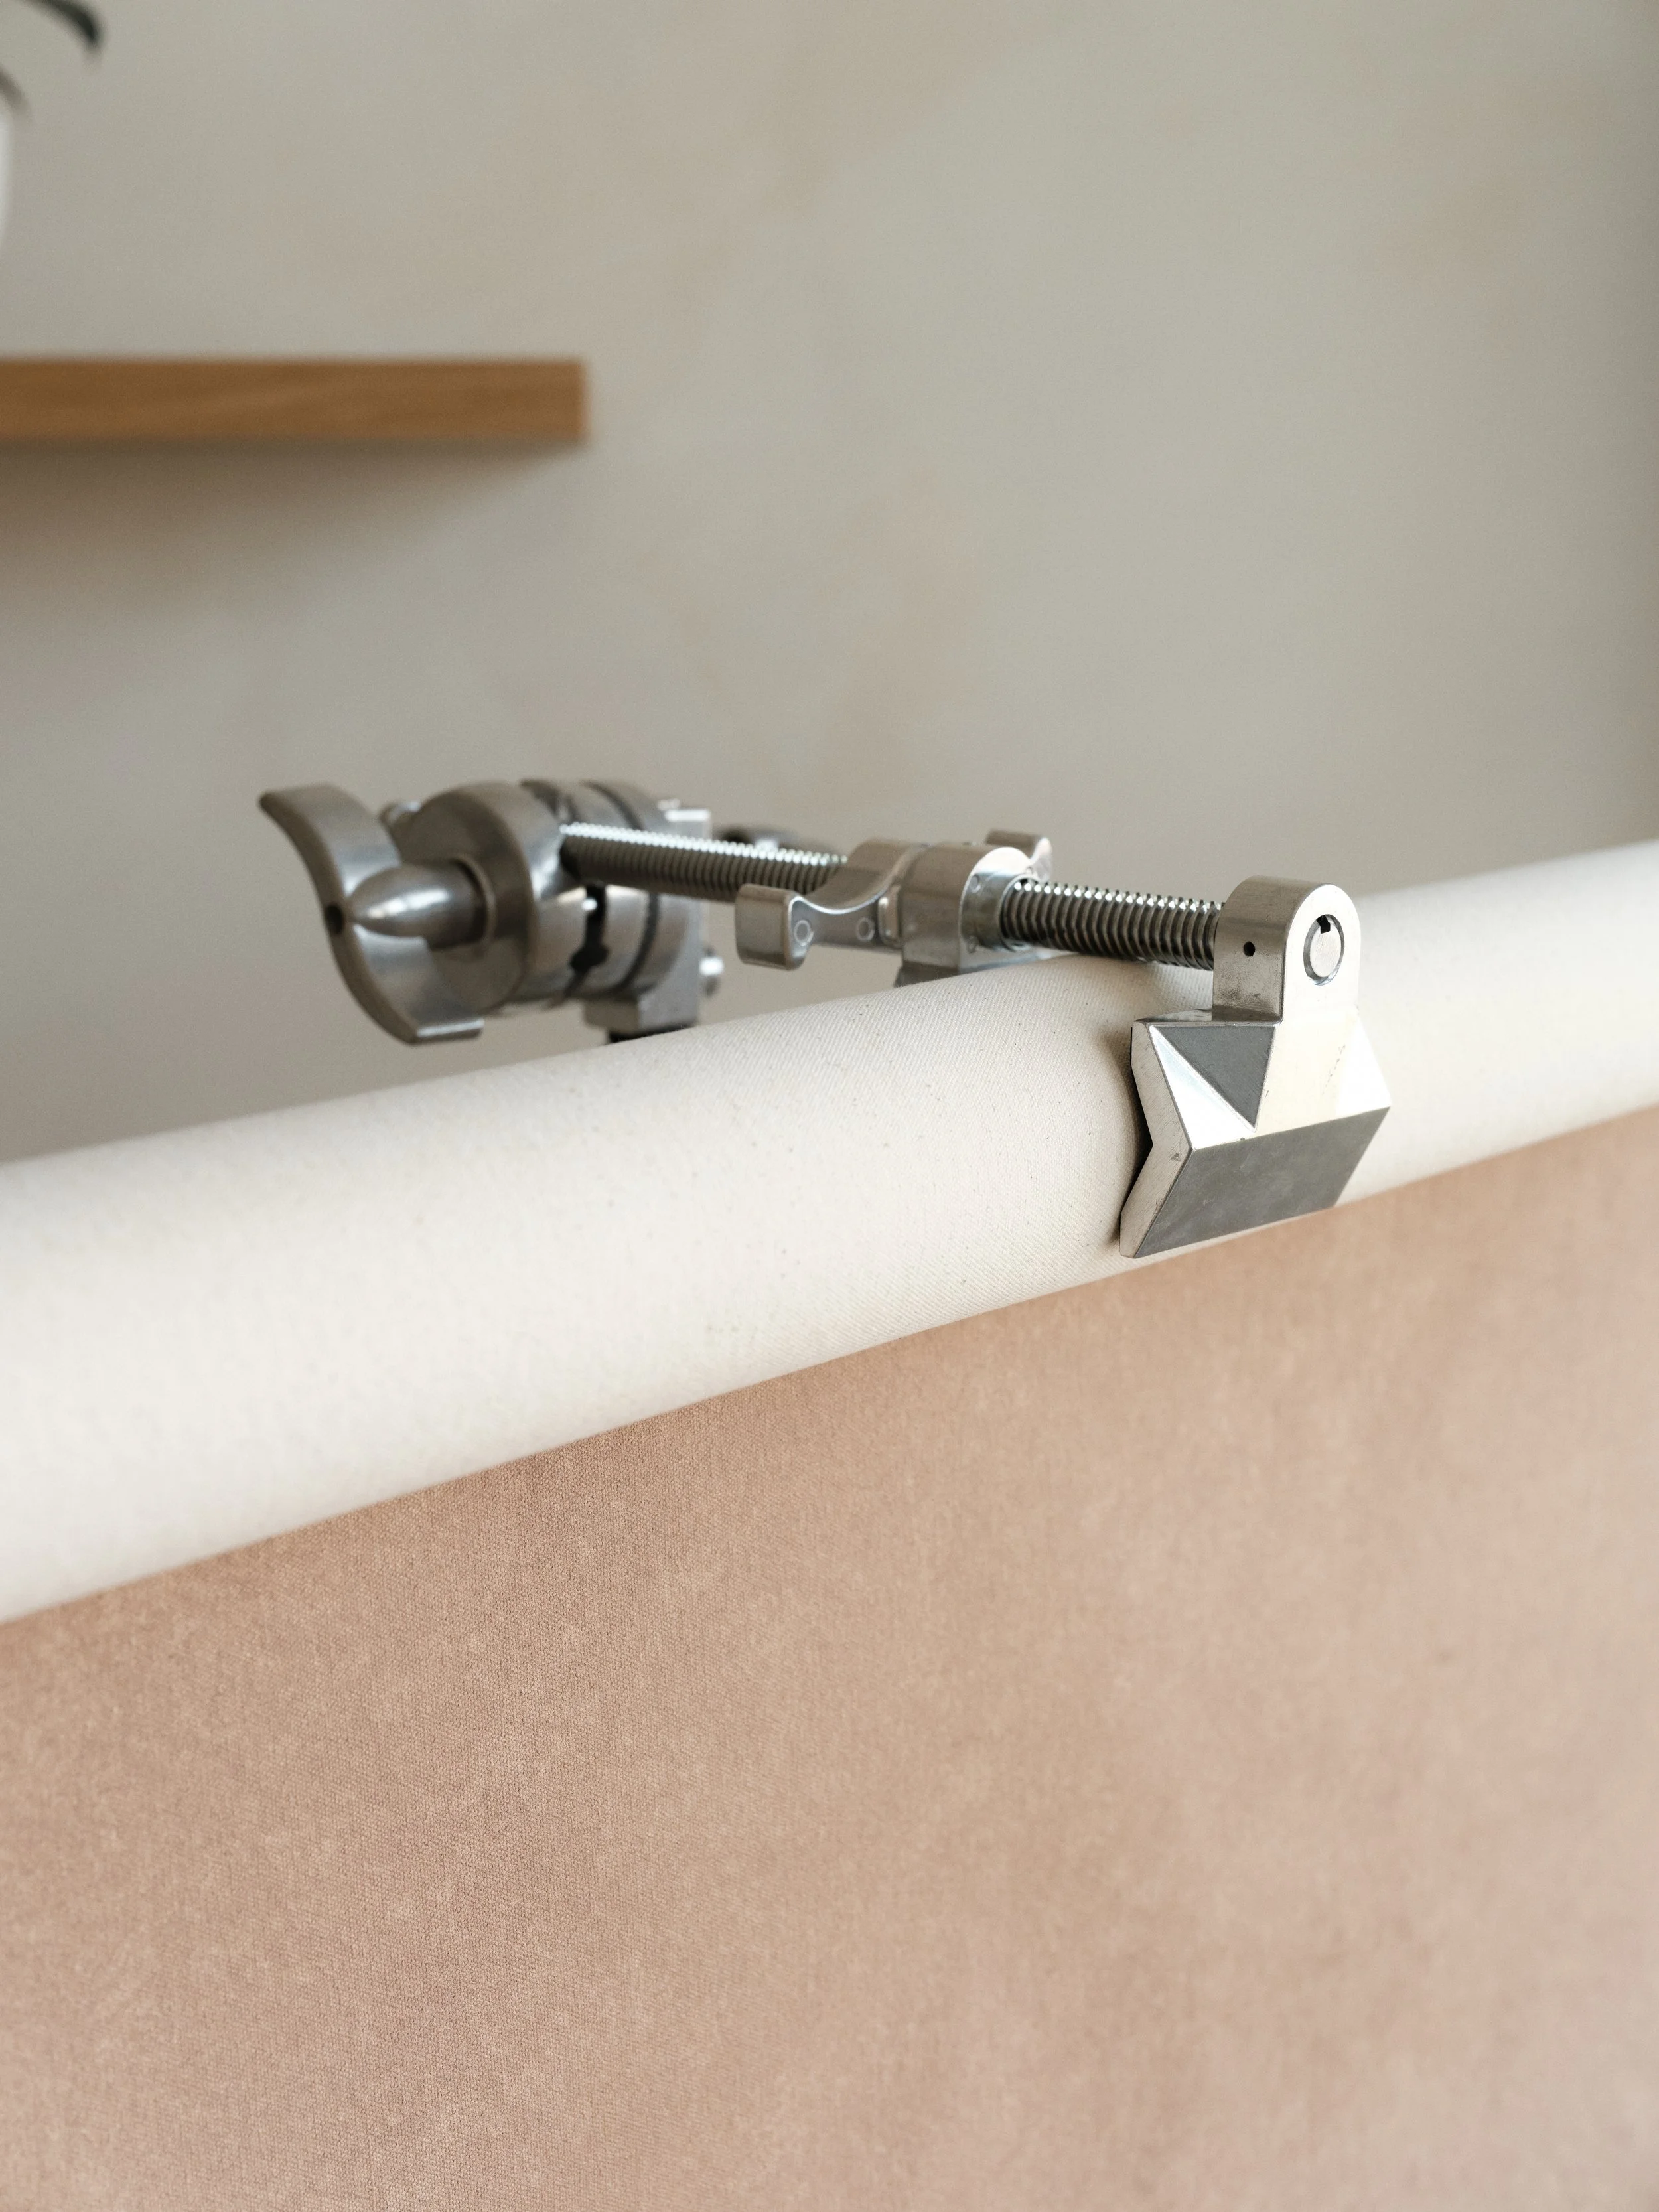
Professional backdrop setup doesn't require complicated systems. This clamp attaches to C-stands for clean, stable mounting without crossbars. It's the 2-minute setup method explained in our guide, practiced once at home, effortless on location forever.
Part 5: Lighting Your Backdrop
The same backdrop can look completely different depending on how you light it. This is a feature, not a bug. It means one backdrop gives you multiple looks.
Natural Light Techniques
Window light, subject priority: Position your subject to receive the window light directly. The backdrop falls into slightly lower exposure, creating natural separation. This is the simplest setup and works for 80% of natural light scenarios.
Window light, backdrop priority: Position the backdrop to receive window light directly, with your subject between window and backdrop. This creates a brighter, airier feel but requires careful exposure to avoid blowing out the backdrop.
Time of day matters: Morning and late afternoon light is warmer and softer. Midday light (even indirect) is cooler and harsher. Your warm-toned backdrop will photograph differently at 9am vs. 2pm. This isn't a problem. It's an opportunity for variety.
Studio Strobe Techniques
Single light setup: One light on your subject at 45 degrees creates a classic portrait look. The backdrop falls into natural shadow on the far side, creating depth. This works well with darker backdrops where you want mood.
Two light setup: Add a second light behind your subject, pointed at the backdrop. Set this 1-2 stops below your key light. This lifts the backdrop out of shadow while maintaining depth. Works well with lighter backdrops.
Creating drama: Use a grid or snoot on your key light to restrict spill onto the backdrop. This creates a spotlight effect on your subject while the backdrop falls darker. Combined with a dark backdrop, this creates magazine-editorial mood.
Common Lighting Mistakes
Backdrop too bright: If your backdrop is blowing out or competing with your subject, it's receiving too much light relative to your subject. Either flag it (block light from reaching it) or reduce the output of any backdrop-specific lighting.
Backdrop too dark: If your backdrop is falling to pure black when you wanted visible texture, add fill light specifically for the backdrop. Even a white reflector bouncing light back can make a significant difference.
Uneven lighting: If one side of your backdrop is significantly brighter than the other, your light positioning is off. The solution is usually to move your light further back (increasing the light-to-subject distance) which creates more even coverage.
Part 6: Care and Maintenance
Your backdrop is an investment. Treat it like one and it'll last a decade.
Storage Rules
Always roll, never fold. Folding creates creases that are nearly impossible to remove. Rolling distributes stress evenly across the fabric. Use a cardboard tube if you have one, but even rolling without a tube is better than folding.
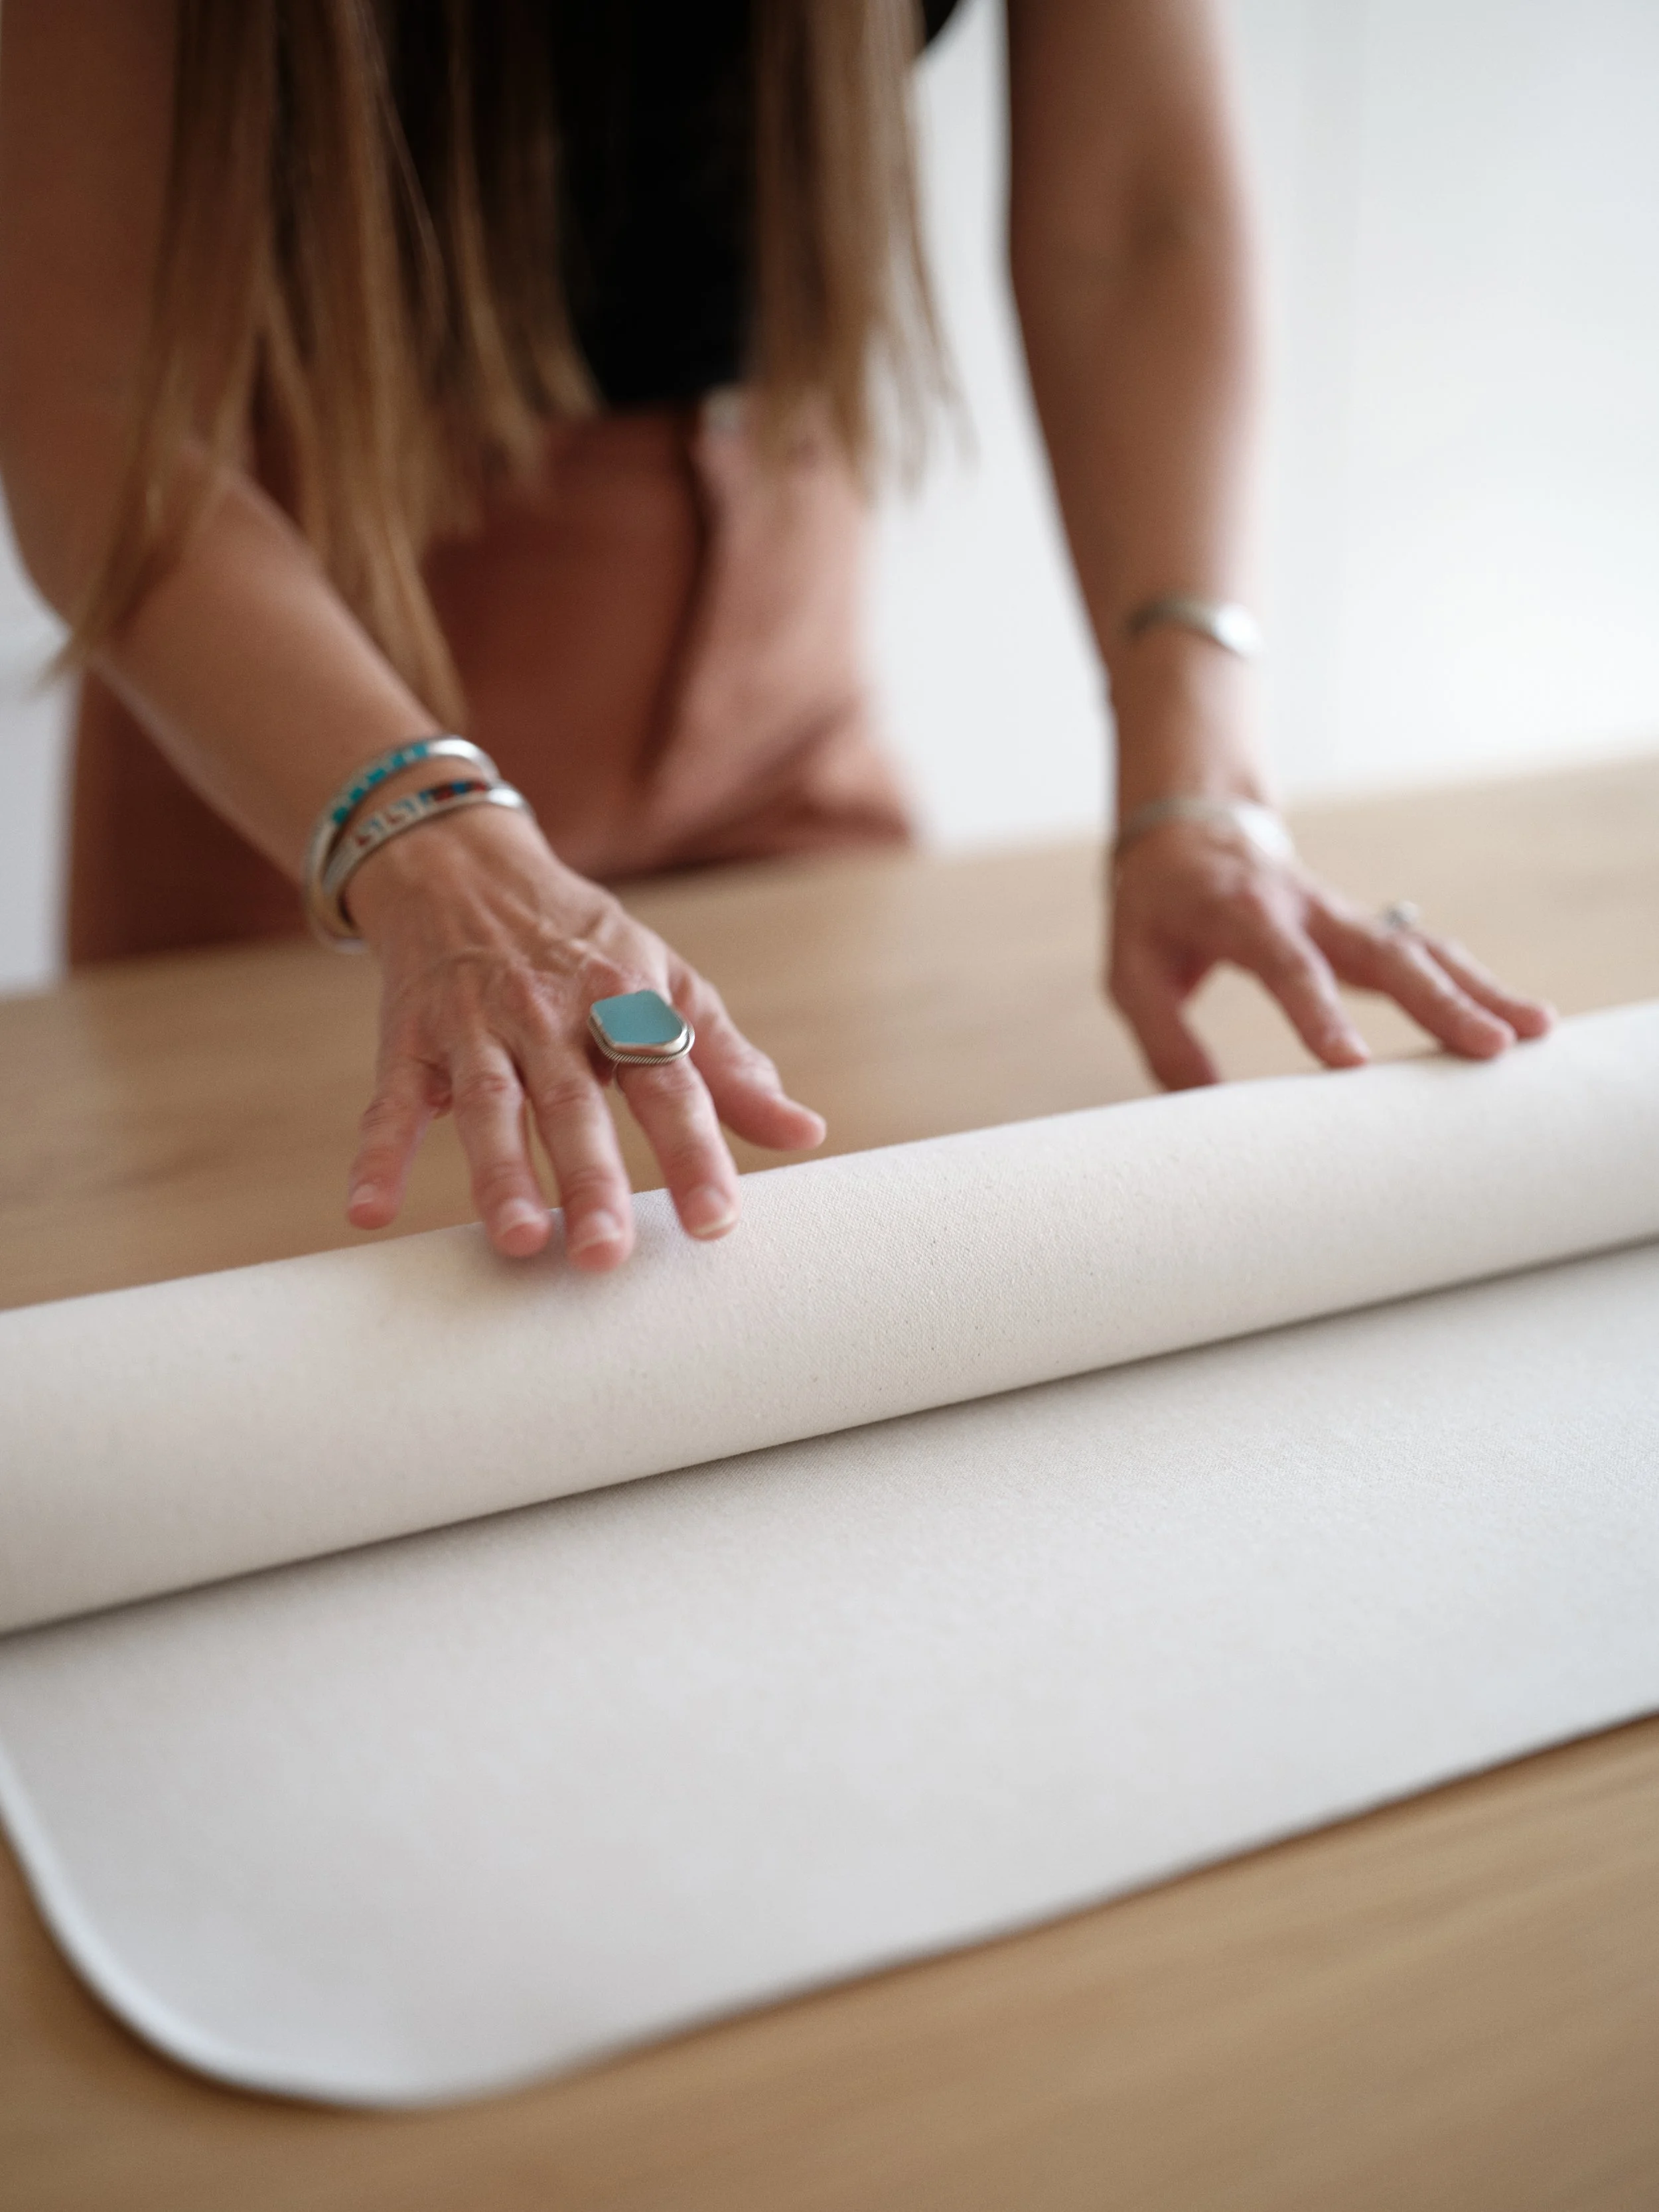
Always roll, never fold. This one storage rule protects your $500+ investment and keeps your backdrop wrinkle-free for 10+ years. Folding creates permanent creases that ruin your shots. Rolling takes 30 seconds and saves you hundreds in replacement costs.
Store upright or suspended. Laying a rolled backdrop flat for extended periods can create flat spots. Store rolls standing upright (like a roll of wrapping paper) or hang them horizontally on a wall-mounted holder.
Climate control matters: Extreme humidity can cause mildew. Extreme dryness can cause paint to crack over time. A climate-controlled closet is ideal. Avoid attics, garages, and spaces with temperature swings.
Cleaning Hand-Painted Canvas
Dust and debris: Use a soft brush or lint roller to remove surface dust before shoots. This takes 30 seconds and prevents particles from showing up in your images.
Scuff marks: Light scuff marks often wipe away with a soft, slightly damp cloth. Wipe gently in the direction of the canvas weave. Avoid scrubbing, which can damage paint.
Serious stains: For significant staining, spot-clean with mild soap and water. Test in an inconspicuous area first. Avoid harsh chemicals, bleach, or abrasive cleaners which will damage the paint.
Wrinkle Removal
Prevention first: Most wrinkles come from improper storage (folding) or transport (crushing). Roll properly and wrinkles stay minimal.
Steam method: For wrinkles that develop, hang the backdrop and steam from the back side. Keep the steamer 6+ inches from the fabric to avoid water spots. Work in sections from top to bottom.
Gravity method: Many minor wrinkles relax naturally after hanging for 30-60 minutes. If you have the time, try gravity first before breaking out the steamer.
Part 7: Building Your Collection Strategically
Don't buy five backdrops at once. Build strategically based on actual use.
The Smart Progression
Month 1-4: Your neutral workhorse Buy one warm neutral backdrop in the size that fits your most common scenario (probably 8x10). Shoot every session on it. Learn its personality. Understand how it behaves in different light.
Month 5-12: Your second color Based on what you wished you had during actual shoots, add a second backdrop. This might be darker for mood work or lighter for airy aesthetics. It might be a different size for specific use cases.
Year 2+: Specialty additions Now you can add colors for specific purposes. A deep green for holiday minis. A soft pink for newborn sessions. A dramatic black for editorial work. Each addition should serve a specific, identified need.
The Bundle Option
If you already know you need three colors and want to build your collection faster, bundles save $120-294 depending on size. But only bundle if you've already identified three colors you'll actually use.
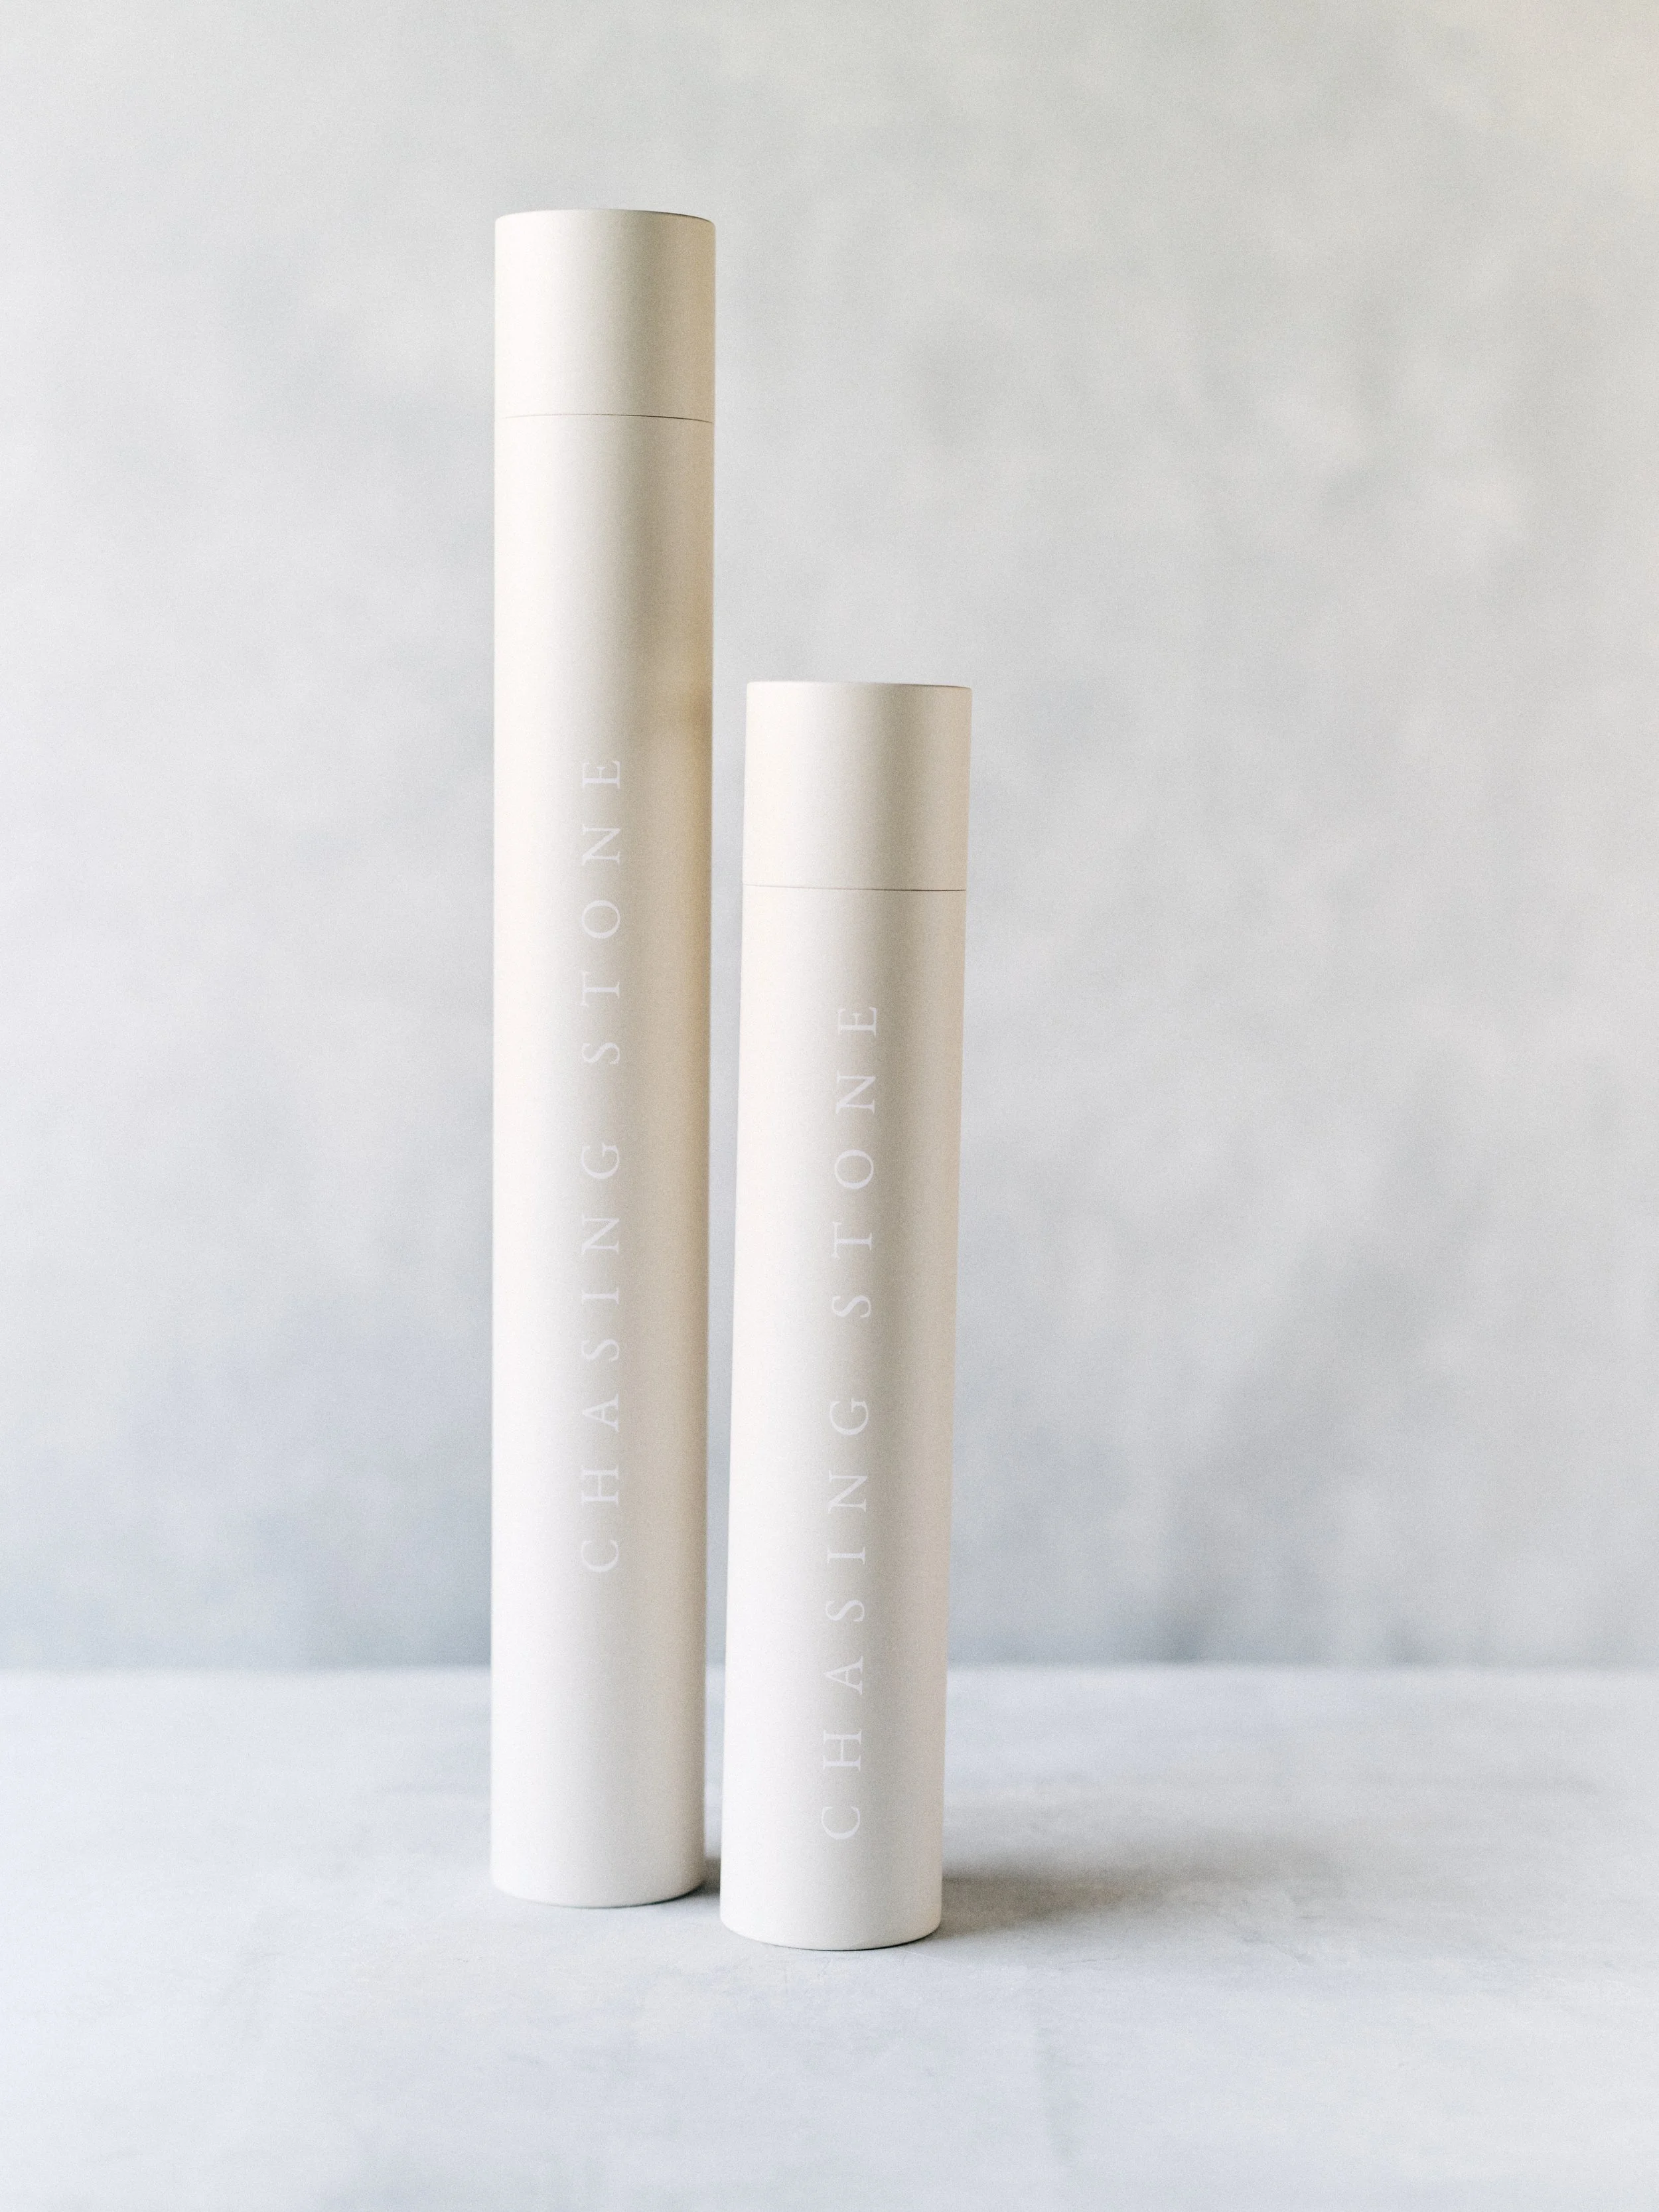
We hand-paint every backdrop in our Orange County studio, then ship them in protective tubes so they arrive in perfect condition. No creases, no damage, just canvas ready to transform your portfolio the moment you unroll it.
Part 8: When NOT to Use a Backdrop
Backdrops aren't always the answer. Knowing when to use natural backgrounds makes you a better photographer.
Natural Backgrounds Win When:
The environment tells the story: Some wedding venues are architecturally stunning. Some portrait locations have meaningful connections to your client. Covering these with a backdrop would remove important context.
Time is extremely limited: If you have 5 minutes for portraits and no setup time, work with what's there. A mediocre natural background used skillfully beats a backdrop you're frantically trying to set up.
The client specifically wants environmental portraits: Listen to your clients. If they want outdoor, natural, in-context images, that's what they should get.
Backdrops Win When:
The environment is ugly or distracting: Beige hotel walls. Cluttered getting-ready suites. Venues with zero character. Backdrops create beauty where none exists.
You need diversity: Building a cohesive portfolio requires visual consistency through diversification. Backdrops give you control that natural environments can't.
You want editorial impact: That magazine-spread quality? It comes from intentional, controlled environments. Backdrops are the foundation of editorial portrait work.
Part 9: The Portfolio Transformation
Let's talk about what actually changes when you invest in professional backdrops.
Your Work Looks Different Immediately
This isn't a "maybe you'll see results in six months" situation. Your very next shoot looks different. The portraits you deliver have that intentional, editorial quality you've been admiring in other photographers' work.
The gap between where your portfolio is and where you want it to be? It closes the moment you stop shooting against venue walls and start shooting against surfaces designed to make your subjects look incredible.
Brides Book You Because of What They See
When a couple is comparing photographers, they're scrolling through portfolios looking for someone whose work matches the vision in their head. Cohesive, editorial backdrop usage signals that you're a professional who shows up prepared. It tells them their portraits will look like the ones they've been pinning for months.
Photographers who invested in backdrop systems in 2024-2025 reported 15-20% increases in booking inquiries. Not because backdrops are magic. Because their portfolios finally looked like the work they were capable of creating.
You Show Up Confident
There's something that shifts when you walk into any venue knowing you can create beautiful portraits regardless of what the walls look like. You're not hoping the getting-ready suite has decent light and acceptable backgrounds. You're not scrambling to find the one corner that doesn't look terrible.
You have complete creative control. That confidence shows in your work, your client interactions, and the experience you deliver.
The Real Investment
A professional backdrop isn't about saving money over time. It's about the work you want to create and the clients you want to attract.
If you're happy shooting against whatever backgrounds venues provide, you don't need this. But if you've been looking at other photographers' work wondering why theirs looks editorial while yours looks like a snapshot against a wall, now you know what's different.
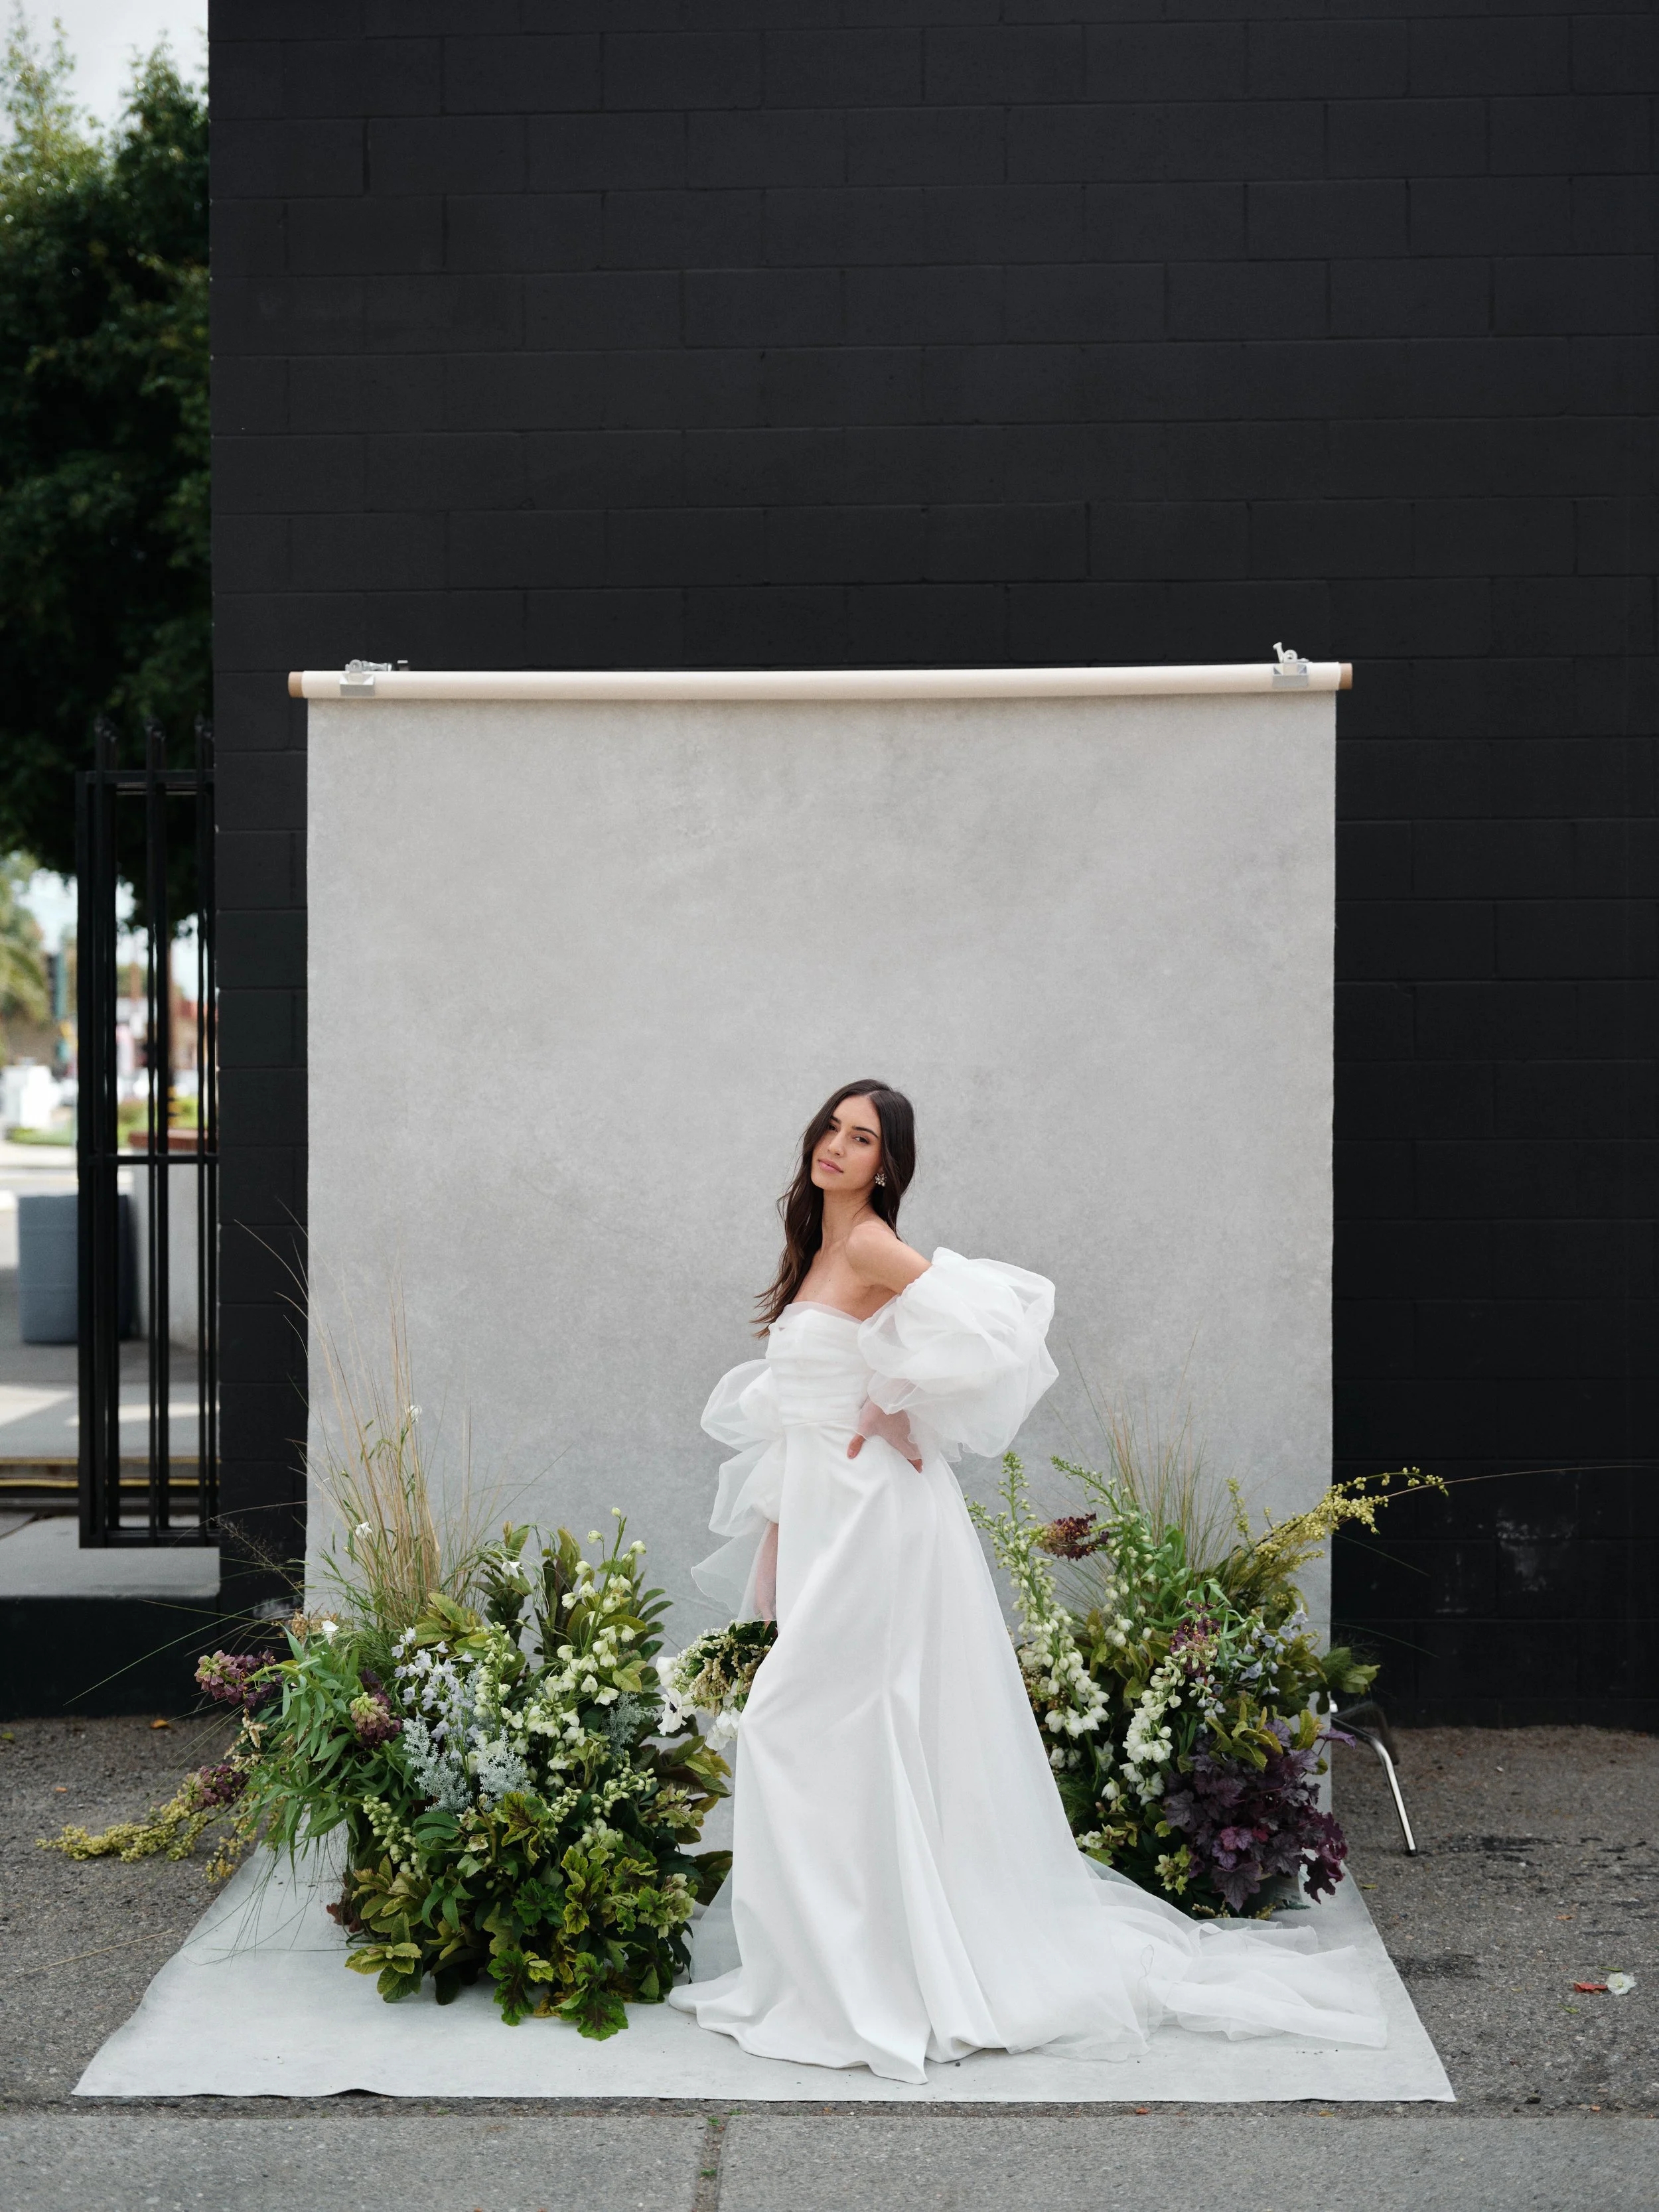
See what LIMESTONE does for bridal portraits? That warm taupe tone flatters skin beautifully while the hand-painted texture creates natural dimension. The 8x10 size gives you room for flowing trains and movement without frantically checking your frame edges.
Your Next Step
You've read this far, which means you're serious about improving your work. Here's what I'd do:
Assess your current situation. What backgrounds are you actually using now? What's working? What's frustrating?
Identify your most common scenario. Headshots? Full-length? Groups? This determines your starting size.
Start with one neutral. Seriously. One great backdrop used consistently beats five mediocre ones used randomly.
Practice setup before client sessions. Get your 2-minute setup dialed in at home, not on a wedding day.
Expand based on actual needs. After 10-20 sessions, you'll know exactly what you wish you had. That's when you add your second backdrop.
If you're ready to stop making excuses for bad venue walls and start showing up to every session with complete creative control, explore our hand-painted canvas backdrops at chasingstone.com/shop-all.
Every backdrop is painted by hand in my Orange County studio. No two are identical. And they're built to last through hundreds of sessions while making your work look better every single time.
Frequently Asked Questions
What is the best material for photography backdrops?
Hand-painted canvas is the professional standard for portrait and wedding photography. Canvas absorbs light naturally, creating dimension and depth that vinyl and paper cannot replicate. Canvas is also more durable, traveling without creasing, and lasting 10+ years with proper care.
What size backdrop do I need for full-length portraits?
For full-length portraits of individuals or couples, an 8x10 foot backdrop provides adequate coverage. For groups of 4 or more, or for bridal parties with flowing gowns, an 8x14 foot backdrop is recommended to avoid edge creep in your compositions.
How far should my subject be from the backdrop?
Position your subject 3-6 feet in front of the backdrop. This distance prevents shadows from falling on the backdrop and creates natural separation between subject and background. For shallow depth of field shots where you want the backdrop to blur, increase the distance to 6-8 feet.
What backdrop color is most versatile?
Warm neutrals like taupe, putty, and light tan are the most versatile backdrop colors. These tones complement all skin tones, work with any wardrobe color, and photograph beautifully in both natural and studio light. They are the recommended first backdrop for any photographer building a collection.
How do I prevent wrinkles in canvas backdrops?
Store canvas backdrops rolled (never folded) on a cardboard tube. If wrinkles develop, hang the backdrop and lightly steam from the back side, keeping the steamer 6 inches away from the fabric. Most minor wrinkles will relax naturally after hanging for 30-60 minutes.
Canvas backdrop vs muslin: which is better?
Canvas is superior for professional photography. Canvas holds texture and paint better, absorbs light more naturally, wrinkles less, and lasts significantly longer. Muslin requires constant steaming, stretches over time, and cannot hold the same depth of hand-painted texture.
How much does a professional photography backdrop cost?
Professional hand-painted canvas backdrops range from $497 for a 5x8 foot size to $1,197 for an 8x14 foot size. This is an investment in your portfolio and the quality of work you deliver to clients.
What backdrop colors photograph best with different skin tones?
Warm neutrals (taupe, tan, warm grey) work universally across all skin tones. For warm skin tones with yellow or olive undertones, earthy colors like terracotta and sage complement beautifully. For cool skin tones with pink undertones, dusty blues and soft greys create flattering contrast. Avoid pure white backdrops as they can cast unflattering color onto skin.
Written & Reviewed by Jennifer Founder & Lead Artist, Chasing Stone Hand-painting photography backdrops since 2018 Over 10,000 backdrops shipped to photographers in 50+ countries
Last updated: January 2026
Related Reading
Why the 8x14 Backdrop Size is a Game-Changer for Wedding Photographers
Neutral vs Bold: Choosing the Right Backdrop Color for Your Brand
2026 Wedding Photography Trends: Backdrops, Colors & Textures
Shop Backdrops
View All Hand-Painted Canvas Backdrops →
Popular Colors:
Bundles (Save $120-294):
Deep Dive Guides
Choosing the Right Backdrop
Lighting & Color
Care & Setup
Business & ROI

Creators of premium photography backdrops and styling surfaces
Trusted by thousands of discerning creatives worldwide
Every piece is handcrafted with intention in Orange County, California